
 Paper
PaperDescription
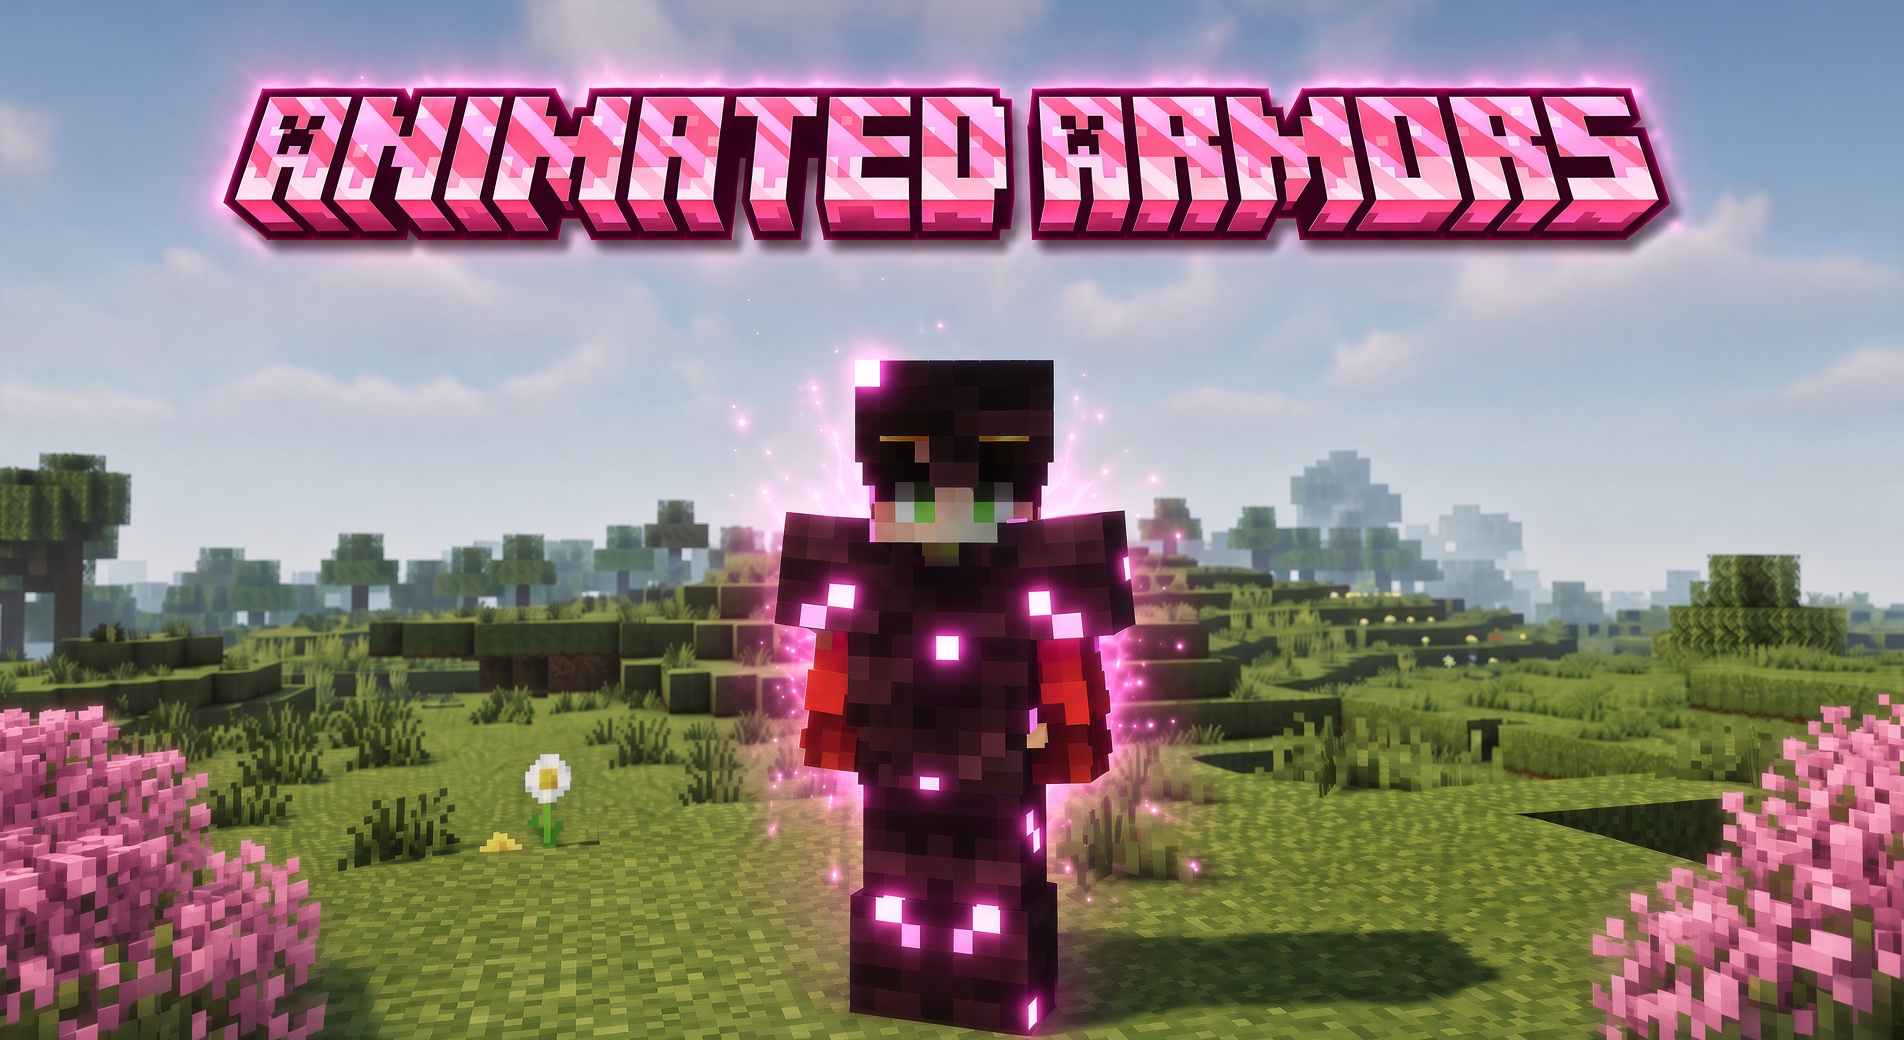
AnimatedArmor
Living, glowing custom armor for your server — no client mods required.
AnimatedArmor turns your static Nexo or ItemsAdder custom armor into smooth, GPU-animated
gear that plays right on the player's body, for everyone around them. Frame-by-frame animation,
glowing emissive detail, and full shaderpack support — all driven automatically from the armor
textures you already make. If you can make a custom armor set, you can animate it.
ItemsAdder doesn't animate its component (equipment-tag) armor on its own — AnimatedArmor adds it.
☑ Works on Java and Bedrock
Runs on Java servers out of the box. For Bedrock players, the generated pack converts cleanly
with SMCConverter (Java → Bedrock)
— tested and working, so your animated armor reaches every player on a cross-play server.Converter docs: docs.smcconverter.com
🙏 A massive thank you to SayMC, the creator of SMCConverter, for getting AnimatedArmor
working on Bedrock.
| Platform | Paper 1.21.6 – 26.2 (recommended 1.21.11+), Java 21 |
| Requires | Nexo or ItemsAdder 4.0.18+ to work (either one) |
| Optional | PacketEvents (prevents textures flashing on player). |
| Clients | Java: vanilla + shaderpack (Iris/OptiFine), auto-detected. Bedrock: via SMCConverter (Java → Bedrock) |
| Config per armor | None — reads your Nexo / ItemsAdder armor automatically |
Contents
- Quick Start
- Installation
- Creating Animated Armor
- Nexo
- ItemsAdder
- Emissive / Glow
- Configuration
- Commands & Permissions
- How It Works
- Compatibility
- Troubleshooting
- FAQ
Quick Start
AnimatedArmor ships with a ready-made example set (Cherry) for both backends. With
AnimatedArmor installed alongside Nexo or ItemsAdder, run:
/aarmor generate cherry/aarmor generate cherry installs the example into whichever backend is present. Then apply it and
equip a piece:
On Nexo
/nexo reload all
/nexo give <you> cherry_chestplate
On ItemsAdder
/iareload
/iazip
/iaget           (grab the pieces from the IA GUI)
It animates on your body, glows, and everyone around you sees it. Use it as a working reference for
building your own — see Creating Animated Armor.
Installation
| Requirement | Notes |
|—|–|
| Paper (or a Paper fork) | |
| Java 21 | The plugin is built for Java 21. |
| Nexo or ItemsAdder | One is required. AnimatedArmor hooks whichever is installed (it can run with both). It disables itself on startup only if neither is present. |
| PacketEvents | Optional but recommended. When present, AnimatedArmor rewrites in-flight equipment packets so viewers never see a flash of the raw texture strip. |
Steps
- Stop the server.
- Drop
AnimatedArmor.jarintoplugins/(alongside Nexo and/or ItemsAdder, and PacketEvents if you use it). - Start the server. On first run it writes a default
config.yml. - Set up an animated armor (see below) or run
/aarmor generate cherryfor the example. - Rebuild the pack — Nexo:
/nexo pack(or/nexo reload all); ItemsAdder:/iareloadthen/iazip.
On enable you'll see the backend it hooked:
[AnimatedArmor] Hooked Nexo — armor with an animation .mcmeta will animate on the next Nexo pack generation.
[AnimatedArmor] Hooked ItemsAdder — component armor with an animation .mcmeta will animate on the next IA pack build (/iazip).
[AnimatedArmor] AnimatedArmor enabled.
After a pack build, a working set logs something like:
[AnimatedArmor] Animated entity/equipment/humanoid/cherry.png (24 frames, frametime 8, interpolated, emissive)
[AnimatedArmor] Patched entity.fsh in base to animate armor.
[AnimatedArmor] Shaderpack fallback: generated 192 per-frame equipment asset(s).
Creating Animated Armor
You don't register anything in AnimatedArmor's config — it reads your existing armor automatically.
Set the armor up in Nexo or ItemsAdder as normal, then make two small additions to the armor-layer
textures.
The animation itself is identical for both backends — a vertical frame strip plus an animation.mcmeta. Only the file names/locations and the rebuild command differ. The shared rules:
1. Make the armor-layer texture a vertical frame strip. Stack the frames top to bottom in one
PNG. A single armor-layer frame is width × (width / 2), so a 64-wide layer is 64×32 per frame
and the strip height is 32 × frameCount:
| Frames | Strip size (64-wide) |
|---|---|
| 2 | 64 × 64 |
| 8 | 64 × 256 |
| 24 | 64 × 768 |
You need at least 2 frames.
2. Add an animation .mcmeta next to each strip, named after it (<strip>.png.mcmeta):
{
  "animation": {
    "frametime": 2,
    "interpolate": true
  }
}frametime— ticks per frame (20 ticks = 1 second). Omit it anddefault-frametimeis used.interpolate—trueblends smoothly between frames;falsesnaps.
3. Leave the control-pixel corner clear. AnimatedArmor stores timing data in the **top-left
3 pixels of frame 0** — keep that corner empty/transparent in your art.
4. Rebuild the pack (per backend, below). Rejoin (or re-accept the pack) and it animates on
anyone wearing it.
Tuning: speed-multiplier scales every animation; default-frametime sets the frametime used
when a .mcmeta omits it (see Configuration).
Nexo
Prerequisite: a working Nexo custom armor set (item + equippable → asset_id + the usual_armor_layer_1 / _armor_layer_2 textures). If it shows up statically in-game, you're ready.
- Layer strips are Nexo's normal source textures, found by file name (in any folder):
<prefix>_armor_layer_1.png (helmet / chestplate / boots) and <prefix>_armor_layer_2.png
(leggings). Add the matching <prefix>_armor_layer_1.png.mcmeta.
- Location: either the main pack (
Nexo/pack/assets/…) or a Nexo external pack
(Nexo/pack/external_packs/<name>/…) — both are scanned.
- Rebuild:
/nexo pack(or/nexo reload all).
ItemsAdder
ItemsAdder's component (equipment-tag) armor — the modern equipments: block with layer_1 /layer_2 — is exactly what IA does not animate itself. AnimatedArmor adds the animation.
Prerequisite: a working IA component armor set. In your namespace config:
equipments:
  cherry:
    type: armor
    layer_1: armor/cherry/layer_1
layer_2: armor/cherry/layer_2- Layer strips live in
ItemsAdder/contents/<namespace>/textures/armor/<name>/:
layer_1.png (helmet / chestplate / boots) and layer_2.png (leggings). Add the matching
layer_1.png.mcmeta beside them.
- Rebuild:
/iareloadthen/iazip.
The armor folder name must match the equipment name (IA's own convention —
armor/cherry/for
equipmentcherry).IA re-encodes equipment textures when it builds the pack, so AnimatedArmor reads your original
strips straight fromItemsAdder/contents/…— no quality loss, no manual steps.
Run /aarmor generate cherry on an IA server to drop in a complete, working example you can copy.
Emissive / Glow
AnimatedArmor can make parts of your armor glow full-bright, in step with the animation.
Optional, no client mods needed. Works the same on Nexo and ItemsAdder.
Drop an emissive strip next to the colour strip, same size, with an _e suffix:
| Backend | Layer 1 emissive | Layer 2 emissive |
|---|---|---|
| Nexo | <prefix>_armor_layer_1_e.png |
<prefix>_armor_layer_2_e.png |
| ItemsAdder | armor/<name>/layer_1_e.png |
armor/<name>/layer_2_e.png |
Rules:
- Non-black pixels glow; black/transparent pixels don't.
- The
_estrip must be the same dimensions as its colour strip. If it isn't, the emissive is
ignored (with a warning).
- No
.mcmetaneeded on the_estrip — it follows the colour strip's timing.
Glow is delivered per client state: vanilla / Iris-no-shaderpack via the injected shader (baked into
the frame's alpha); shaderpack ON via labPBR _s (set your pack's RP Support to labPBR,
e.g. Complementary); OptiFine via its own _e.png convention.
Configuration
config.yml. You never list armors here — the plugin reads your Nexo / ItemsAdder armor
automatically.
# Scale every animation's playback speed. 1.0 = as the .mcmeta asks; 2.0 = twice as fast.
speed-multiplier: 1.0

# Frametime (ticks per frame) assumed when a strip's .mcmeta omits it. Minecraft's default is 1.
default-frametime: 1

# Log each armor texture animated during pack generation.
debug: true

# Core shader patching (advanced)
shader:
  skip-overlays:
    - mythicarmor

# Shaderpack fallback (advanced)
shader-fallback:
enabled: true| Key | Default | What it does |
|---|---|---|
speed-multiplier |
1.0 |
Global playback-speed scale for all animations. |
default-frametime |
1 |
Frametime used when an armor's .mcmeta omits one. |
debug |
true |
Logs each armor texture animated during pack generation. |
shader.skip-overlays |
[mythicarmor] |
Resource-pack overlay directory names (case-insensitive substring) whose core entity.fsh must not be patched — used to avoid breaking 3D-armor plugins that ship their own entity shader (MythicArmors). |
shader-fallback.enabled |
true |
Generates one equipment asset per frame so shaderpack players (whose GPU can't run the core-shader animation) still see the armor animate via per-tick frame swapping. |
After changing the config, apply it with /aashader reload (or restart / rebuild the pack).
Commands & Permissions
| Command | Description | |||
|---|---|---|---|---|
/aarmor generate cherry |
Installs the bundled Cherry example into whichever backend is present — Nexo (external_packs/ + items/, then /nexo reload all) and/or ItemsAdder (contents/animated_armor/, then /iareload + /iazip). |
|||
| `/aashader [on\ | off\ | auto\ | status]` | Per-player animation mode. on = shaderpack frame-swap, off = smooth GPU, auto = client-brand detection (default), status = show your mode. Saved across relogs. |
/aashader reload |
Reload config.yml (admin). |
|||
/aashader debug <player> |
Diagnostic report for a player (admin). |
Both backends auto-detect shaderpack players and frame-swap them. The per-player
/aashader
override is available on the Nexo path; the ItemsAdder path uses automatic detection.
| Permission | Default | Grants | |||
|---|---|---|---|---|---|
animatedarmor.shader |
everyone | `/aashader on\ | off\ | auto\ | status` |
animatedarmor.admin |
op | /aashader reload, /aashader debug, /aarmor generate |
How It Works
At pack build, AnimatedArmor hooks the pack-generation step of whichever backend is running
(Nexo's post-generate event, or ItemsAdder's pack-compressed event) and:
- Finds animated armor — Nexo: scans
Nexo/pack/assets/andNexo/pack/external_packs/
for *_armor_layer_1/2.png.mcmeta. ItemsAdder: reads the original strips + .mcmeta from
ItemsAdder/contents/<ns>/textures/armor/<name>/ (the backend drops the .mcmeta when it builds
the equipment texture, so the timing is recovered from the source).
- Bakes the animation — packs the frame count, frametime and interpolation flag into control
pixels in frame 0, and merges the emissive _e strip if present.
- Wires up the shader — merges its animation branch into every core
entity.fshin the pack
(base + version overlays) rather than clobbering yours; ships its own only if nothing overrides it.
- Generates fallback frames (if
shader-fallback.enabled) for the frame-swap path — smoothly
interpolated where the .mcmeta asks for it.
Two render paths, chosen per player:
- GPU core-shader (vanilla players) — the shader reads the control pixels and the world time and
samples the current frame every render. No per-tick server work.
- Frame-swap fallback (shaderpack players, and Bedrock via Geyser) — shaderpacks replace core
shaders, so for those players AnimatedArmor swaps the worn armor's frame server-side each tick via
client-only equipment packets. Because each frame is a normal texture, any shaderpack renders it.
Who gets which is auto-detected by client brand and can be overridden with /aashader. With
PacketEvents installed, AnimatedArmor also rewrites outgoing equipment packets so shader viewers
never flash the raw strip when armor changes.
Compatibility
- Nexo and ItemsAdder — either one works; AnimatedArmor hooks whichever is installed and can
run with both.
- PacketEvents — optional; removes the one-frame raw-strip flash on equip.
- Other entity-shader plugins (Animotions, ItemsAdder's own emote shader, …) — compatible:
AnimatedArmor merges into the existing core entity.fsh instead of replacing it.
- 3D-armor plugins (MythicArmors) that ship their own core entity shader — AnimatedArmor leaves
their shader alone (via shader.skip-overlays) so it doesn't break their 3D armor.
- Clients — vanilla and shaderpack (Iris/OptiFine) are both supported and auto-detected; players
can toggle with /aashader.
- Bedrock (cross-play) — Bedrock clients (via Geyser) don't run Java resource packs directly,
but the generated pack converts cleanly for Bedrock with
SMCConverter (Java → Bedrock),
which AnimatedArmor has been tested with. Converter setup docs:
docs.smcconverter.com.
- Minecraft — supported 1.21.6 – 26.2 (1.21.5 and below are not supported — those clients
use an older core entity shader). Recommended/tested 1.21.11 – 26.2, Java 21. ItemsAdder
tested on 4.0.18.
Note: AnimatedArmor's GPU animation rides the vanilla core
entityshader, which Mojang can
restructure between Minecraft versions. If a future update ever changes it, the console will say so
at pack generation (see Troubleshooting), and shaderpack players are unaffected (they use the
frame-swap fallback).
Troubleshooting
AnimatedArmor is loud — most problems print a clear reason at pack build. Keep debug: true.
| Message | Meaning | Fix |
|---|---|---|
No animated armor found — no *_armor_layer_1/2.png.mcmeta ... (Nexo) |
No animation .mcmeta was found in pack/assets/ or pack/external_packs/. |
Add a .mcmeta next to each armor-layer strip; make sure the textures are in the main pack or an external pack. |
No animated ItemsAdder armor found — no ... armor/<name>/layer_N.png.mcmeta ... |
No animation .mcmeta beside the IA source strips. |
Add layer_1.png.mcmeta (and/or layer_2) in contents/<ns>/textures/armor/<name>/; ensure the folder name matches the equipment name. |
Skipped <tex> — … neither the colour strip nor its _e has 2+ frames |
The strip isn't a multi-frame strip. | Make it a vertical strip of 2+ frames, each width × (width/2). |
Emissive for <tex> was ignored — the _e strip must match the colour strip's width. |
The _e strip's size doesn't match. |
Make the _e strip the same dimensions as its colour strip. |
Found N ... .mcmeta ... but no matching entity/equipment texture |
The .mcmeta prefix doesn't line up with a generated equipment texture. |
Nexo: check the strip prefix matches the armor + the item's asset_id. ItemsAdder: the armor folder name must match the equipment name. |
Left overlay/<dir> entity.fsh alone (third-party 3D-armor shader …) |
An overlay matched shader.skip-overlays and was skipped on purpose (e.g. MythicArmors). |
Intended. Remove it from shader.skip-overlays only if it isn't a 3D-armor shader. |
Could not patch <where> entity.fsh — unrecognised structure |
The core shader structure wasn't recognised (usually after a Minecraft update). | Report the MC version; the shader needs an update. Frame-swap still animates shaderpack players meanwhile. |
Armor shows as a static strip — the animation didn't wire up for that viewer, or the client is
still on the old cached pack. First relog / re-accept the pack after any rebuild (the pack hash
changes). Then check the pack-build logs; common causes: the strip isn't multi-frame, the
control-pixel corner was painted over, or the player is on a shaderpack withshader-fallback.enabled: false.
It animates for some players but not others — that's the vanilla-vs-shaderpack split. Have the
player run /aashader status, and /aashader on|off to force it (Nexo path).
A flash of the raw strip on equip — install PacketEvents.
FAQ
Do I list each armor in the config? No — AnimatedArmor reads your Nexo / ItemsAdder armor
automatically.
Does it work with ItemsAdder? Yes. It animates IA's component (equipment-tag) armor, which IA
doesn't animate on its own — GPU animation for vanilla clients, frame-swap for shaderpack/OptiFine/
Bedrock. Install with /aarmor generate cherry, then /iareload + /iazip.
Do players need a client mod? No. Vanilla players get the GPU animation; shaderpack players get
the automatic frame-swap fallback.
Does it work under shaderpacks (Iris/OptiFine)? Yes, via the frame-swap fallback.
How many frames? At least 2. Each frame is width × (width/2), stacked vertically.
Does it modify the real armor item? No — the frame-swap is a client-only visual change per
viewer; the real item is never touched.
What's the performance cost? The GPU path is essentially free server-side. The frame-swap does
lightweight per-tick packets, and only for shaderpack players. Main cost is pack size (one asset per
frame for the fallback).
Can I animate leggings? Yes — use the layer-2 strip (_armor_layer_2 on Nexo, layer_2 on
ItemsAdder) + its .mcmeta.
Can armor glow? Yes — add a matching _e strip. See Emissive / Glow.
Where can the textures live? Nexo: main pack (pack/assets/) or a Nexo external pack
(pack/external_packs/) — both are scanned. ItemsAdder: your namespace'scontents/<ns>/textures/armor/<name>/.
How do I change animation speed? speed-multiplier in the config, or each armor's frametime.
Does it work on Bedrock? Yes — convert the generated pack for Bedrock clients with
SMCConverter (Java → Bedrock)
(setup guide: docs.smcconverter.com), which AnimatedArmor has been
tested with. Great for cross-play servers.

 Folia
Folia Purpur
 Velocity





Reviews
There are no reviews yet.